Two Day Mountaineering Skills Course
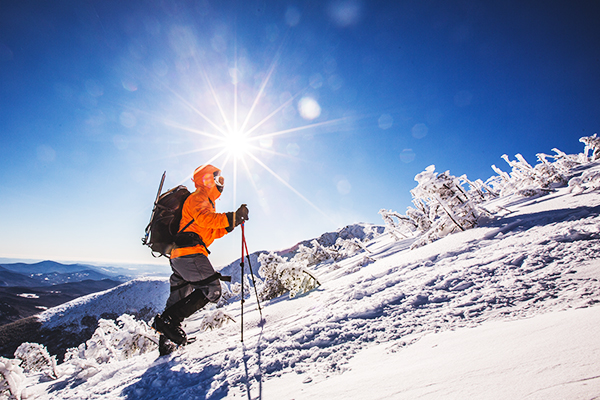
This course is intense and jam-packed with knowledge and skill development for those looking to dive into the world of mountaineering. Over two days we will cover self arrest, crampon technique, rappelling, belaying, anchors and so much more! If you have your sights set on bigger peaks or you are looking to take the first step into more serious terrain, this course is for you.
What To Know
CLIMB DETAILS
Length: 2 Days
Guide-to-Client Ratio: 1:3
Difficulty: Strenuous
When: December - April
Type: Course
Type: Mostly Educational
PRICING
1 person: $600 per person
2 people: $500 per person
3 people: $450 per person
4 people: $400 per person
5+people: Call for rates
RENTAL GEAR
Most of the required equipment [listed below] is available for rent from our affiliate mtnGEAR. NEM climbers will receive an exclusive discount of 20% discount on all rental equipment and clothing.
Hands-On Demonstration & Practice
Due to the intense nature of this course and the amount of information to cover, we may do some minor climbing throughout the course. Time restraints will most likely prevent us from climbing any mountains. Emphasis will be on hands-on experience. Participants should be in reasonable physical condition. No experience is required.
DAY ONE
- Winter gear selection and overview
- Self Arrest
- Crampon Technique
- Foot placements without crampons
- Efficient Packing
- Hydration and Nutrition for mountaineering
- Self care in cold climates
- Basic Knots for mountaineering
DAY TWO
- Belaying
- Rappelling
- Anchor construction
- Running belays
- Rope management
ADDITIONAL TOPICS
- Crevasse Rescue
- Snow Cave Construction

Stay Safe In Avy Terrain
AIARE 1: DECISION MAKING IN AVALANCHE TERRAIN
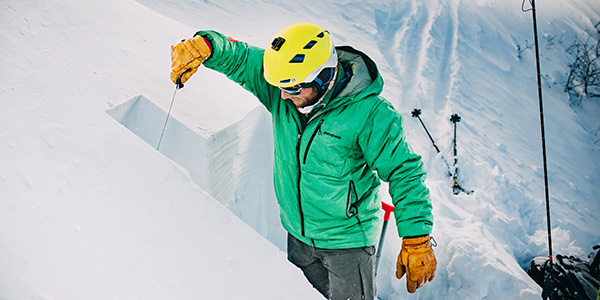
Students can expect to develop a good grounding in how to prepare for and carry out a trip, to understand basic decision making while in the field, and to learn rescue techniques required to find and dig up a buried person (if an avalanche occurs and someone in the party is caught).
PRICING
1 person: $550
Book Online Now
Nutrition
Your “lunches” are taken in the field throughout the day during short 10 to 15 minute breaks. We suggest crackers, pizza, candy bars, jerky, chips, cookies, trail mix, fruits, Gu, energy bars, and hard candies. Drink mixes such as Gatorade and Kool-Aid help flavor your water. Add peanut butter, cream cheese, hard cheese, or pepperoni for additional calories and taste. If you enjoy bread items, bagels work well. Include some salty snacks to replenish lost salts.Hydration
To help prevent cramping and heat related injuries, you will need at least 2 liters of water per day. Water is preferred, but other liquids such as gatorade help replace electrolytes and work well, too!Don’t go over the top
When planning, don’t bring any items that require extensive preparation or cooking. We are able to provide you with boiling water on overnight adventures, but do not have the ability to actually cook food items.For your convenience, we have the mandatory gear available for rent! We also have a small selection of clothing available for rent if you are missing anything listed above. Upon completion of registration, you will receive a welcome packet via email with a gear rental form that you will complete and return to reserve the gear you need for you adventure!
Mandatory Items |
Guides Pick |
| [ ] Pack with Waist Strap: A 3000 cu. in. pack is the recommended size for one day climbs. Your pack MUST have a waist strap. A backpack will not suffice. | Camp M4 |
| [ ] Crampons: 10-12 point adjustable crampons designed for ice climbing. | Camp Cassin C14 |
| [ ] Ice Axe: An ice axe designed for general mountaineering. | |
| [ ] Climbing Harness: A comfortable, adjustable climbing harness. | Camp Group II |
| [ ] Helmet: A lightweight climbing helmet. | Camp Rock Star |
| [ ] Warm Hat: Wool or synthetic. It should be warm and thin enough to fit underneath a climbing helmet. | Camp Race Hat |
| [ ] Balaclava/Neck Gaiter: Optional but recommended | Mountain Hardwear Powerstretch |
| [ ] Ball Hat/Sun Hat: Optional. A lightweight ball cap or sun hat. | |
| [ ] Sun Glasses: A pair of dark-lensed sunglasses with side shields or full wrap-type sunglasses. | Julbo Dolgan |
| [ ] Lightweight glove: One pair of fleece gloves. | Camp G Lite Wind |
| [ ] Medium Weight Glove: Wind/water resistant insulated mountain gloves. | Camp G Tech Dry |
| [ ] Heavy Insulated Glove/Mitten: Wind/water resistant, insulated gloves or mittens for protection against wind, snow and cold. These also serve as emergency back-ups if you drop or lose a glove. | Marmot Expedition Mitt |
| [ ] Base Layer Top and Bottom: Long-sleeve wool or synthetic top will be used as your base layer. Zip-neck styles will allow for better temperature regulation. | Patagonia Capilene 3 |
| [ ] Light Insulating Layer/Soft Shell Top: A fleece or other insulation layer. | Patagonia R1 Hoody |
| [ ] Hard Shell Jacket with Hood: Wind/rain Proof. Gore-Tex recommended. | First Ascent Storm Shell |
| [ ] Insulated Parka: This item becomes of highest importance when we are faced with poor weather. This should be an expeditionary-type heavy parka that extends well below the waist and above the knees. Goose down is recommended versus synthetic fill. It does not have to be waterproof, but that is a nice feature. The parka is worn primarily at rest breaks on summit day and as an emergency garment if needed. When sizing a parka, allow for several layers to be worn underneath; buy it large. The parka must have an insulated hood. | Camp ED Protection Jacket |
| [ ] Climbing Pants: Synthetic climbing pants offer a wide range of versatility. You can wear them alone on hot days, or in combination with the base layer on cold days. The thickness (insulation quality) should be based on how well you do in the cold. | First Ascent Guide Lite |
| [ ] Hard Shell Pants: A pant made of breathable rain and wind-proof material will be needed. Full-length side zippers are required for facilitating quick clothing adjustments over boots and crampons in cold, inclement weather. | First Ascent Rainier Storm Shell |
| [ ] Mountaineering Boots: Insulated plastic boots are the preferred choice for ascents on Mt. Rainier. They provide the best insulation as well as a more rigid sole for kicking steps and holding crampons. Leather mountaineering boots that have completely rigid soles are also adequate, but they will need to be insulated and may still result in cold feet on summit day. Lightweight hiking boots without insulation are not acceptable as they don’t work well with crampons, or in very cold or wet weather. | Scarpa Inverno |
| [ ] Gaiters: A knee-length pair of gaiters, large enough to fit over your mountaineering boots. This will protect you from catching your crampons on loose clothing. | Outdoor Research Expedition Crocodiles |
| [ ] Heavyweight Socks: Either wool or synthetic. Some people find liner socks useful for reducing friction. | Smartwool Mountaineer |
| [ ] Sunscreen |
Book Online Now
Searching Availability...


 We are proud to work with the Department of Agriculture, the White Mountain National Forest and the Androscoggin Ranger District where we are authorized outfitter guides.
